Category Archives: How-To

If You Want Something Done Right, Do it Twice

Well I’ve been working with the aftermath of the Honda overheating for a few days now.  I think a few things occured.  There is a hose that goes to the heater core that had been saturated with engine oil, and it sprung a leak.  I was able to just cut the end of the hose off and reattach it, leak fixed.  Thanks Dad for showing me that trick when the Corvette hose sprung a leak years back. 

Well I was driving in town the other day and when I got to my desitination I could hear a hissing under the hood.  I popped the hood and the top of the radiator was cracked.  I had put in some of that stop leak stuff they sell and it did plug the crack in the radiator, so it does work…At least temporarily. 
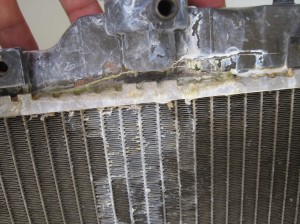

(click to enlarge) Cracked Radiator.

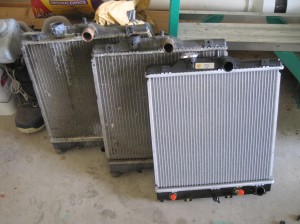
When I got home I remembered that I had an older radiator for the Civic as a backup.  I got it from a friend I work with who had it laying around.  So I swapped that one in.  It is pretty easy to do in this car.  I took it out today and drove around doing some errands.  I popped the hood and checked out the radiator to see how it was holding up.  This one, was cracked in the same exact spot.  Wonderful..lol.  The stop leak worked again however and plugged the crack, I drove it home with normal temperatures.

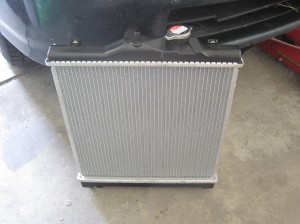
Well….I don’t trust the glue holding things together so I checked and apparently this crack is common on these Civics.  The suggestions in forums was to get an aftermarket radiator from one of the local auto stores.  I was able to find one for $80.  I picked it up and installed it.


Fancy New Radiator

So far this one has been holding up, but I am still checking the car after every trip for leaks.  It got up to 100 degrees here today.  The recent heat has put a lot of components under more pressure and stress than usual.  I actually think my radiator has been cracked for at least a year now, but during the cold temperatures it isn’t an issue. 

There is a lesson in life that I’ve had to learn over and over and that is that sometimes, if you want something done right, you have to do it more than once.   I suppose this is along the lines of ‘practice makes perfect’.   Cassie had come up with this saying when she was doing laundry.  She managed to come up with a lot of wrinkly clothes.  I was giving her a hard time about it and she responded with something to the effect of, “Well….If you want something done right, you have to do it twice”.  It has stuck as one of our sayings ever since.


Two Cracked and One New

The car has 280,468 miles on it now and I am not exactly sure how much longer it will hold out.  I’ve been looking around for a replacement, but if this one can hold out to 300,000 I think that should be enough and I won’t need to buy another car until Rincon!  Even if I do have to hold this one together with glue..lol.


What do you think of this post?
  • WOW (0)
  • Awesome (0)
  • Interesting (0)
  • Useful (0)
  • Bummer (0)
  • Whoa (0)

Busy Beginning to Summer

This past week has been super busy. The day after we closed on the sale of our rental, we had a little dinner party with a few friends at our house. It was fun seeing everyone and catching up. It was also another way to celebrate.


We showed off the garden and the chickens and had a nice Italian style dinner.


Our friend, Dean, with Henrietta in the backyard

Then this week in addition to our busy work schedules with inspections and grant writing for me and an on-call schedule for Britton, we also had another rental in Evans come due for the term of the lease. So we did the walk-through and considering they did 80% of their move-out in less than 2 days, it was surprisingly in great shape.


Outside of the house (we’ve been working to green up the yard)


Living room

But we did have a few repairs to make, so we spent most of yesterday evening and today going back and forth to Home Depot about three times, putting in burned out lightbulbs, painting wall patches, cleaning windows, putting on new trim and fixing a door that had apparently been punched. That took the most time as the replacement door didn’t quite fit and so we had to plane it down to size. It made a huge sawdust mess, all over Britton’s car. lol


Rincon or bust!

We enjoy our work on the rentals even though sometimes it can be aggravating and time-consuming when you don’t know what you’re doing. But we keep getting better and always have an eye on the prize at the end of the day. With these busy Colorado summer days, there’s always something going on.

What do you think of this post?
  • WOW (0)
  • Awesome (0)
  • Interesting (0)
  • Useful (0)
  • Bummer (0)
  • Whoa (0)

And Fixing Houses and Saving Money

There seems to be a theme lately. Things break and sometimes we fix them and sometimes we have someone else fix it. I suppose that I like to pick my battles.

We were over at one of the rentals and the current tenants are moving out at the end of the month. The management company we hired suggested that the yard be cleaned up a bit. Mulch, weed removal and turning on the sprinklers. All pretty basic stuff. When we were working over there, we noticed that they had the AC on (compressor outside was running). It wasn’t a very hot day, and we wouldn’t have had our AC on, but we just kept about our yard work and didn’t think much about it.   Cassie was a weed pulling, rose and tree triming machine!

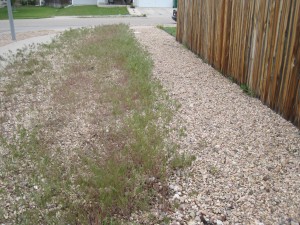
One thing about Colorado is we have tenacious weeds.  They grow even when it’s hot and there is no water.  As a result anytime we put down rocks or mulch the standard operating procedure is to put down some kind of weed barrier.  The landscaping stores sell a fabric that is supposed to keep the weeds down.  And it does…For a while.  Then the fabric starts to break down, or the weeds just start growing in the fabric.  I’ve come to find that it’s worthless as a weed deterrent.


Plastic was used along the fence, landscape fabric on the left

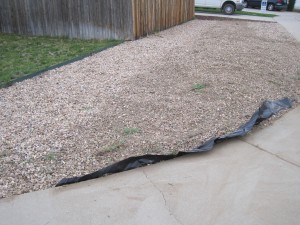
Instead what I have found works really well is the thickest plastic you can find.  It seems to last years and NO weeds come up thru it.   I removed a bunch of rocks, removed the remaining fabric and put down the plastic weed barrier then put the rocks back.  It’s quite a bit of work, but it should be good to go for a number of years now.


After all the rock was moved back in place with plastic instead of the fabric

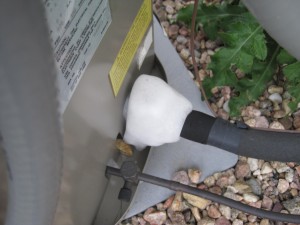
After we put the mulch down in other areas of the yard,  the fertilizer and replaced the fabric with plastic we noticed that the A/C compressor was still running!  I figured this indicated a problem so we took a closer look.  There was ice forming on the coolant line!  I have no idea how long it had been running for, but it needed closer inspection.


Ice Growing on the Compressor Line!

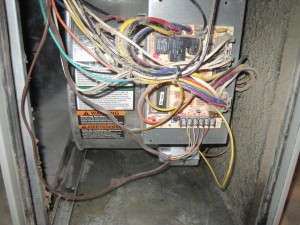
I found that the blower motor on the furnace wasn’t running!  This caused air to not move across the AC coil which meant that it just iced up both outside and inside! Who know how long that AC had been running and not shutting off! Good thing we just happened to be working at the property. The tenants were clueless!

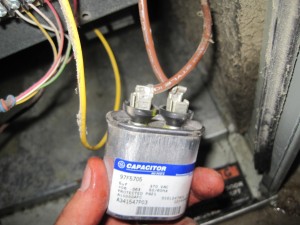
I looked up some info on the internet and from previous experience I figured it was the run capacitor.   They are prone to failure, but also are the cheapest/easiest part to replace.  I pulled the capacitor and got a replacement at a local store here in Greeley.  Rick’s Appliance.  The guy who works there/owns it, Rick, is super honest and every time I’ve gone in the store he has been very helpful.  So for $6 I got a new capacitor.


Run Capacitor for the Blower Motor

I got to the house the next day and the ice had melted off the AC parts and I threw in the new capacitor.  Turned the furnace on and….fan still wouldn’t kick on.  The blower motor fan just buzzed.  I did get it to start by pushing it by hand once but it never worked on its own.  I figured the next part to replace was the motor.

Finding HVAC parts is I think, intentionally hard to do online.  It’s as if they have their own club and if you’re not in it, you aren’t going to find what you need online.   They want you to pay someone to fix your stuff. I found a motor at a place near work.  It cost $80 and is a universal Mars motor.  I was a bit skeptical about using an aftermarket part; I almost always want to get a direct original equipment manufacturer (OEM) replacement.  This causes less hassle with things that don’t fit correct or that might have small differences.  In this case however it was nearly impossible and would have cost ~$400.


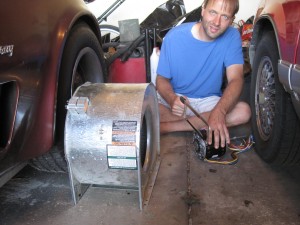
Blower Motor in the Furnace

I put the motor in, wired it up and turned it on.  Worked like a charm!  It did take my time and $86 total (plus tax) but I learned a lot in the process and I had time to do it.  There was no great rush or pressure since the weather here is between seasons and we don’t need AC or Heat. Estimated cost to hire an HVAC person to do what I did: $500!

And it was quite apparent what had caused the motor to burn out: the furnace filter hadn’t been changed in a year! The filter was all bent and sucked inward. Remember to change your filters often, monthly even, if you use your furnace year-round.


Yep, back in the garage on the floor with my blue shirt on..lol

All in all it was a productive few days.  We saved a lot of money by doing things ourselves and we had the time to do it.  I think I want to turn the old motor from the furnace into an electric wind generator.  We’ll see.  As is I am learning all about furnaces and that’s something I won’t need in Rincon…but it never hurts to learn.

The Honda Civic is small but can hold quite a bit! (removing debris from the yard)

What do you think of this post?
  • WOW (0)
  • Awesome (0)
  • Interesting (1)
  • Useful (0)
  • Bummer (0)
  • Whoa (0)

How to Treat a Cat with an Abscess

Well, it turned out Kitty’s lump was indeed an abscess as some of you mentioned. We really appreciate your feedback because we have never seen an abscess before!

We talked with a few people, including a friend who is a veterinarian and another friend who used to be a vet tech and they said that as long as we weren’t squeamish, we could take care of Kitty’s abscess from home and wouldn’t need to take him to a vet.

This post will attempt to describe what it takes to treat a cat with an abscess using just what you have at home or can buy in a store. It is very detailed, so if you don’t like to see open wounds, avert your eyes.

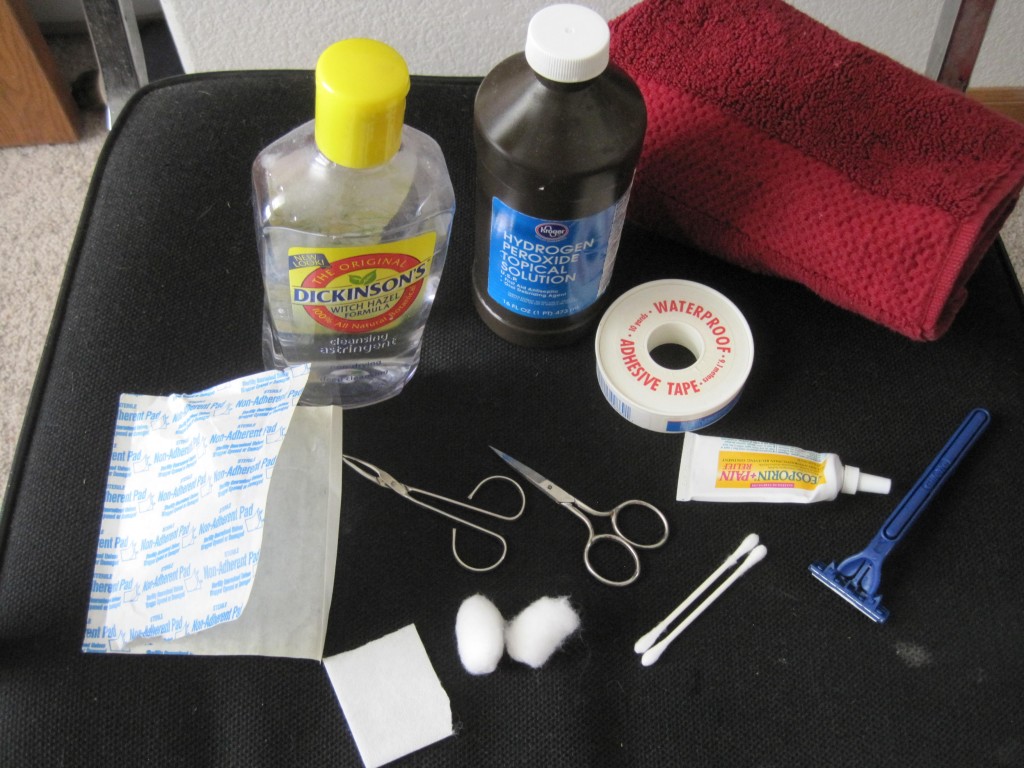
These are the tools we used:


Supplies needed/used to treat Kitty’s abscess

Non-stick gauze pad cut into smaller pieces
Adhesive Tape
Hydrogen Peroxide (in the vet’s office they prefer to use betadine, but we didn’t have any)
Witch Hazel
Small scissors (sterilize by boiling and rubbing with alcohol)
Tweezers (sterilized)
Q-Tips
Cotton balls
Razor (sterilized)
Neosporin (antibacterial gel)
Wash rag
Large Towel (not pictured)
(Note: Make sure to wash hands before and after too!)


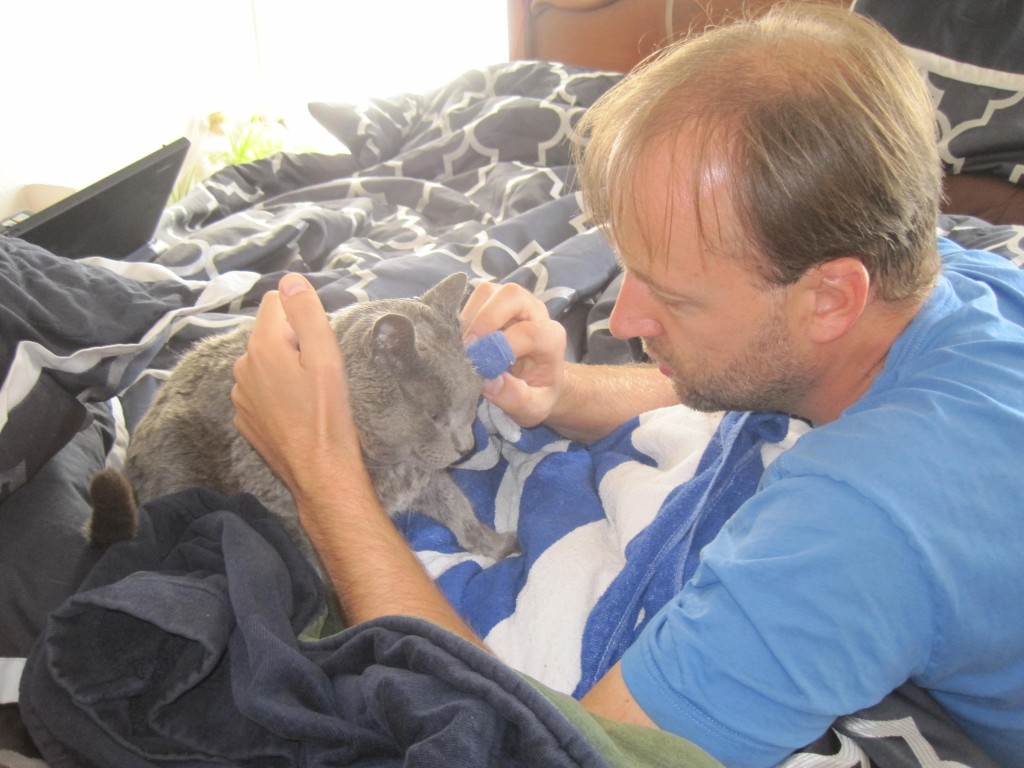
Britton helping Kitty

First we washed the area with the hot wash rag. We gently pressed the warm rag into his head to loosen up the abscess. Soon we noticed pus leaking out, but couldn’t see where it was coming from. So we used the razor to shave the area around the hole. We also used the tweezers and scissors a little to get some of the weird material out of the way.


Our Pussy Cat

You can tell a lot about the progression of the abscess from the pus. In Kitty’s case it was white which means there were a lot of white blood cells in there trying to clear up the infection. If you see green, yellow or really stinky pus, it might be too far progressed to treat at home and the cat may need to be treated (at the vet) for blood sepsis. But for Kitty, this was actually a good sign: we noticed his lump early enough.

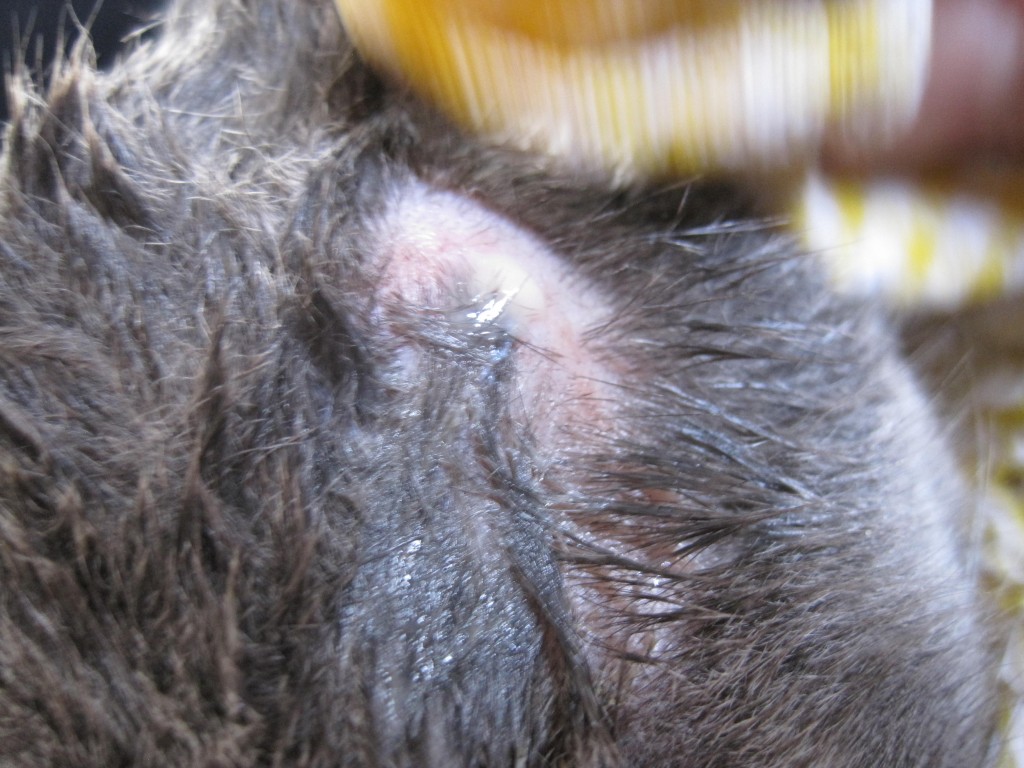
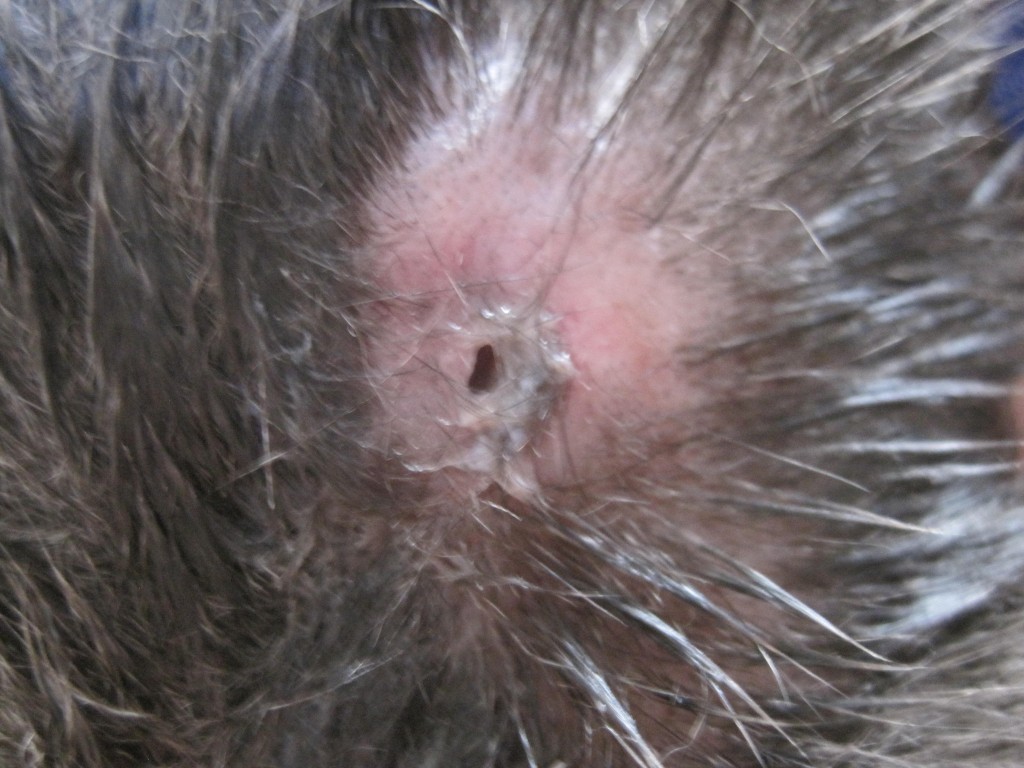
Soon, enough pus popped out that we could begin to see the puncture wound:

Puncture wound at first

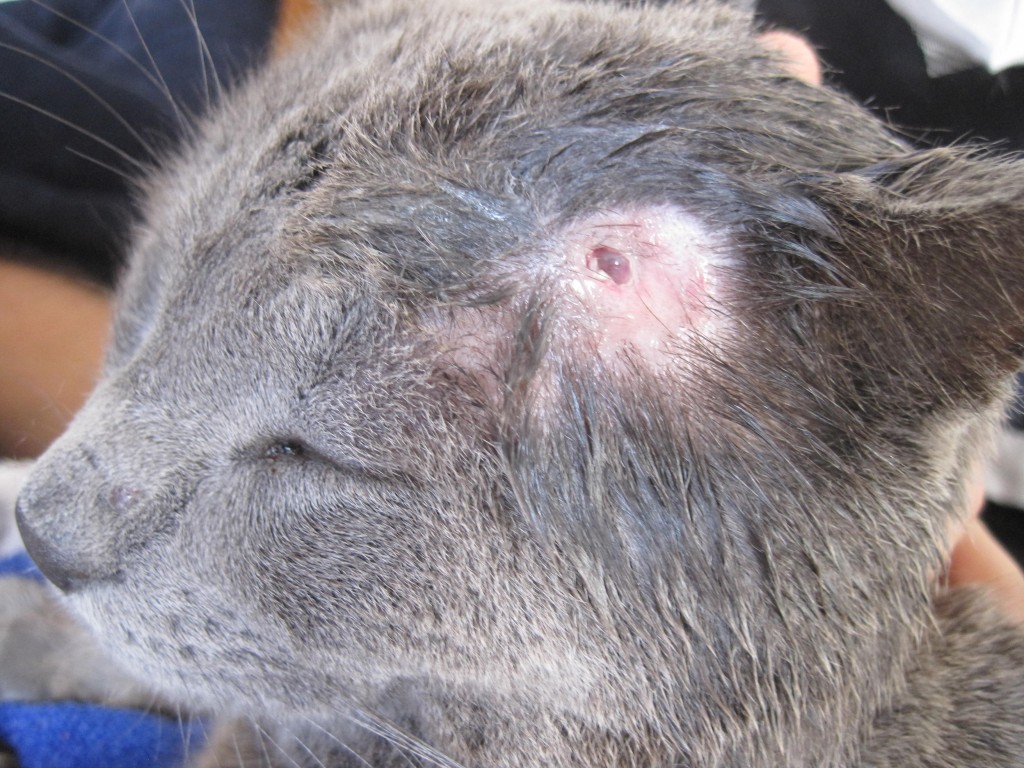
As we got a little deeper into cleaning out the pus and the area around, it was apparent that the wound was much bigger than we initially thought:

Poor Kitty with his gaping hole

Once we got most of the pus and water out and the lump above his eye was gone, we were able to really clean it. We again put a hot wash cloth on him and let it ooze for a little bit as we cleaned it. Kitty didn’t seem to mind. He seemed happy someone was helping him actually.

After a while it pretty much stopped and we poured the peroxide into the wound. It fizzed a little and then went down. We put more peroxide on a cotton ball and pressed it lightly into the hole where it really fizzed. Kitty squirmed a little at this, but was ok. Then we applied the Witch Hazel tincture which is an astringent and helps to reduce swelling (Witch Hazel is usually the main active ingredient in things like Preparation H). The Witch Hazel formula is mostly rubbing alcohol, so it also has antiseptic qualities.

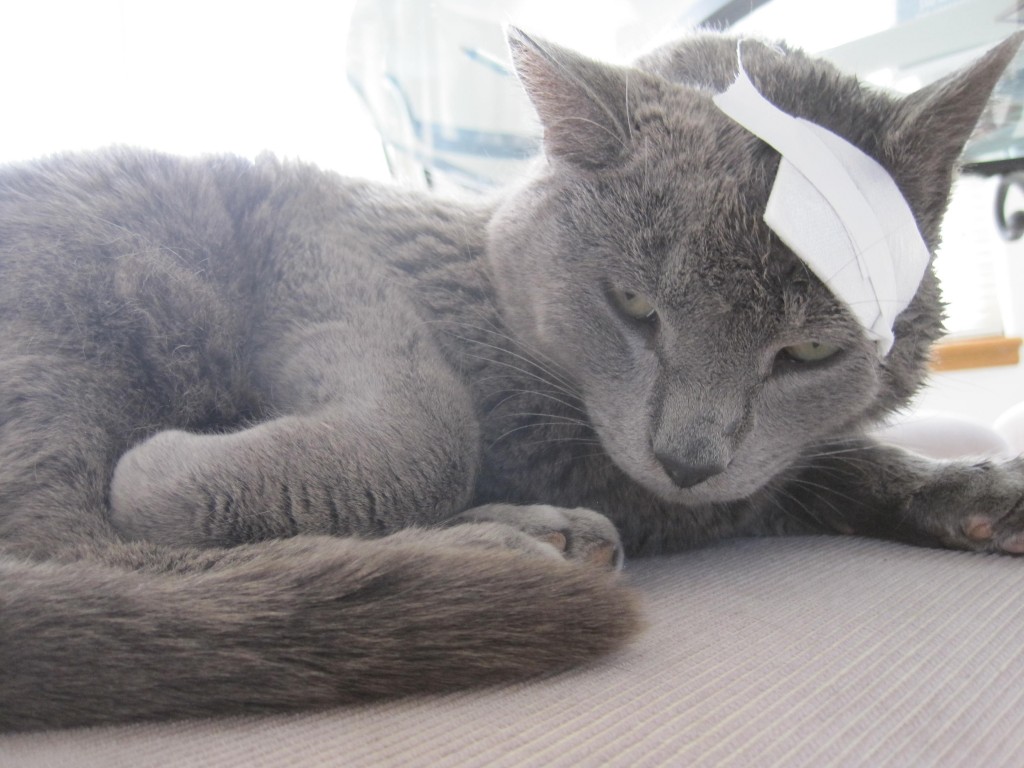
Finally, we used a Q-tip to apply neosporin to the hole and we put neosporin on the gauze pad too. Then we put the gauze pad on him and wrapped his head with the medical adhesive tape. He looked like a brain surgery patient!


Kitty in recovery

We kept the bandage on the first full day. The second day we let him have it off so he could clean (lick) his face a little and the hole could air out to begin to form a scab if it was ready. Later the second day it looked like it was starting to scab, but we thought we would clean it again since it could have had any number of germy things introduced during the day. This time we didn’t try and get deep into the hole, but just washed the surface with a cottonball and peroxide.

The final step in treatment of an abscess usually calls for antibiotics to kill any system-wide bad bacteria. We don’t have access to any antibiotics, so we asked our vet friend if she would write us an Rx. She said as long as he is healing, they are not necessary; so that was surprising!

We are so happy that Kitty is getting better and we learned a lot in the process. If you have cats, we hope this never happens to them, but if it does, you’ll now know what to do.


By the third day, a scab had started to form and he’s feeling much better!

Here’s a video of it too!

What do you think of this post?
  • WOW (18)
  • Awesome (26)
  • Interesting (7)
  • Useful (41)
  • Bummer (4)
  • Whoa (0)